Pages

31.7.11

Blight

Blight
Every season the garden has taught us something new.  We have been very fortunate to have a fairly pest free experience up until this point.  This year we have seen asparagus beetles, eggplant fleas, and some random parasite effected a row of our garlic and is wreaking havoc on some of our celeriac.  Both of the latter two, have no real known natural predator!  Though we have had our fair share of pests this season, everything overall is healthy and made it past the danger zone for these problem creatures.  Everything except our beloved cucumbers.

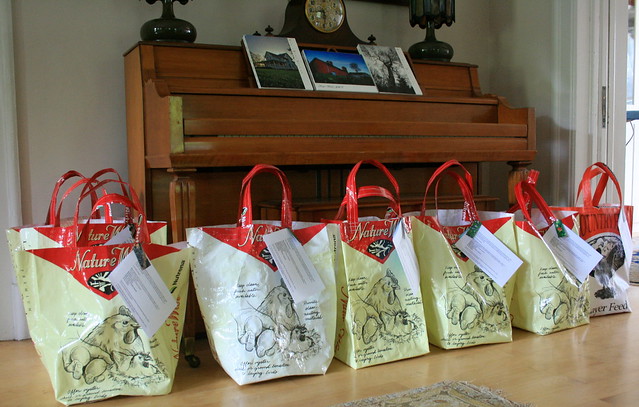
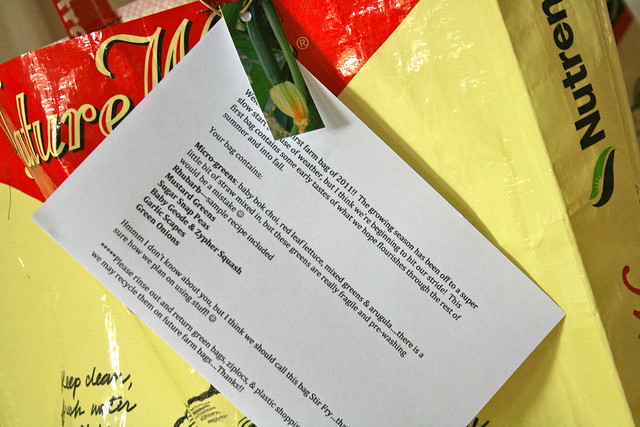
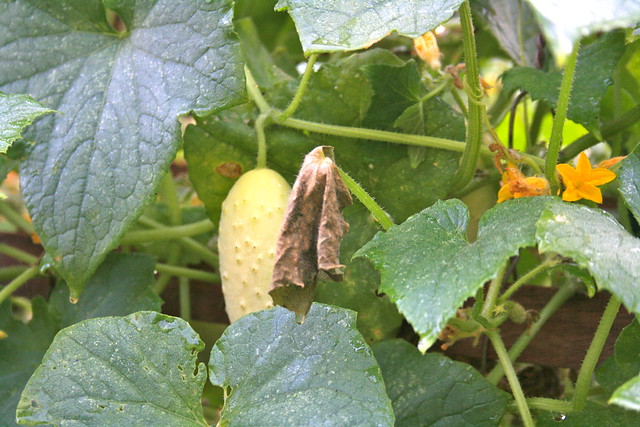
I blogged last year about how excited we were to be doing tons of old fashioned crock fermenting for all of our pickles; we could hardly keep up with the production!  So this year we planted double, so that we could still have a large pickling harvest as well as accommodate our farm bags.  Suddenly just as production was getting in it's groove and the baby cucs were growing up, our plants began to die.  Upon research, we found that if we had a few cucumber beetles early on, then the plants would have been effected by blight.  The result would be that the cucumbers wouldn't mature fully and the plants would die.  The above pictured plant is showing the first signs.  We're not sure if the four plants we have remaining are strong enough to weather through, or are just going to be the last to give up the fight.  We have had plenty of fresh cucumbers for Greek salads and for farm bags, but alas, there will be no pickling this year (at least of the cucs).

We aren't sure if our strangely cool early season, where we saw one warmish week at the beginning of June and then cooled off to spring temps again, is the culprit.  Or maybe the way we left the beds insulated with straw when we winterized last season is to blame, but this year we are going to approach our fall garden prep  a little differently.  We are going to burn all of the straw that we mulched with, compost all of the plant material (as we have done before), and plant more beds to cover crops.  Then we will see if we run into the same issues next season.  Not only are we ever in tuned with the weather, we inspect our plants constantly as we walk the garden, and are always learning something new.  We have now had an education in blight, and though disappointing, we are better for it!

If you want to see some of what is coming soon in our garden click here :)

25.7.11

den klog kone

mushrooms
rowan berries
in the sixteenth century, danish villages often had a person they called "den klog kone" (literally, the clever wife). to be den klog kone was a positive thing - they knew about herbs and worked to heal people who were sick - these women were strong and capable and essential to a village. but there was a fine line between being den klog kone and being a witch - get on the wrong side of someone in the village and that line would be crossed and one would be persecuted (and maybe even killed) for being a witch.

i've been fascinated this year by foraging. the idea of finding food along the roadside, in the forest, or on the beach is very appealing. partly, it's about getting something for nothing, but even more, it's about that knowledge that den kloge kone had.  it's about knowing what plants are good for what. if they have medicinal qualities. are they edible? what flavors they have and what flavors they go with. how the plants can be used.

it strikes me sometimes that we've lost so much knowledge - so much that people once knew. so much about nature and how to really do things and make things. all those things that den kloge kone of the village once knew. or ma and pa in the laura ingalls wilder books.

for me, a big part of living more sustainably involves relearning some of those things. which mushrooms are edible, which of the plants growing in the ditch might be used to spice up some schnapps or make a tasty jelly or if those flowers would make a nice cordial.  i'd like to know just enough to be den kloge kone, but definitely not a witch.

14.7.11

garden lessons

i suppose we're at the halfway mark with the garden and it seemed like time for some assessment.


we had a month-long strawberry harvest. i learned from it that i am a horrible judge of when the strawberries are finishing, as i kept thinking, "this must be the last time i'll pick this many berries" and then the next time, i'd pick two buckets instead of just one. we ate strawberries every evening and in many different ways and i put up a dozen jars of strawberry marmalade (several quite large) and had a big jar of strawberry porridge (jordbær grød) in the fridge that lasted for a week's worth of desserts. and we never bought a single strawberry from the grocery store. so i think we can safely say that the strawberries were a success. the next step with the strawberries is to do a thorough weeding and then prepare to take the little fledgling strawberries for new beds next spring. this we do by digging in a little plastic pot below the runners, settling their roots into some good potting soil and encouraging them to take root. in the spring, we dig up the little pots and move them to a new bed.


as for other things, we haven't yet begun to havest in earnest. our weather has been rainy and a bit cool, so some of the expected lush growth hasn't yet happened. nearly every day, tho', i can add tuscan kale to my dishes, as it's thriving in our cool, rainy weather. we will soon have more broad beans and runner beans and borlotti beans than we know what to do with (i'm already planning on canning them various ways). and the raised bed of brassicas is looking good and the cabbages finally appear to be forming heads of cabbage - we were a bit worried for awhile that they were just going to keep making leaves. i've been harvesting small stalks of broccoli for stir frys for a couple of weeks.


moving our rhubarb didn't seem to hold it back and all of the plants have come back and are producing in earnest. you can get some ideas as to what i've done with it here. we now have three rows of asparagus going - the row you can see on the left was asparagus we bought in pots last autumn - it should be ready to begin harvesting in two more years (one lesson from gardening is patience). there are two additional rows of asparagus i started from seed back in march. i didn't read the instructions on the packet, which made it sound quite difficult, but just planted them in little pots. every single of one of them came up and despite their tiny stature, they are all thriving very well, even after i planted them out.  so the lesson in that - don't be scared away by difficult-sounding planting processes, just jump in and try it.  it will likely be 5 years before we can begin to harvest from those, but i'm hoping the wait is worth it.


we had a number of things that just didn't come up. primarily beets and spinach and kohlrabi and parsnips. our carrots are extremely patchy. what's frustrating is that we don't really know what lesson to take from the experience. was the soil too cold when we planted? did birds eat the seeds? did we not plant deep enough? too deep? not enough fertilizer? not enough water? too much? is our soil too sandy?  i would love to learn from the experience, but feel that i don't know what the lesson is. i find that a bit frustrating.


our artichokes, which are a perennial, are doing very well. they took off like mad after husband put a load of horse poo around them. you have to be careful doing that, as it can burn them, but the artichokes seemed to love it! as to the eggplants in the greenhouse - we can see that their roots have reached down to the layer of horse poo and have taken off like mad.


our sweetcorn is pretty patchy as well, as you can see in this photo, but it just hasn't been warm enough for corn. we do think part of it is that one brand of seeds - Albertine's Have - were duds, as i think that all of the seeds which didn't do what we expected were that brand. in all, i think the garden should be farther ahead and more lush than it is and i'm not sure how to ensure that next year. we're talking about more raised beds for the more delicate items as one measure. more pre-planting indoors and in the greenhouse to prepare for planting out. we will work more horse poo into the soil this autumn - actually, that yellow-ish patch to the right (i just mowed down the tall weeds) will be next year's garden and we're soon going to be plowing in some manure in the coming weeks to prepare for that. another thing we're going to do is more continuous planting. planting new rounds of salads and radishes and things and daring to replant what didn't come up. we definitely haven't done enough of that this year.

what lessons is your garden teaching you? and if you have any ideas as to what lessons i should be learning from our garden failures, i'm all ears!!

12.7.11

first honey harvest


on thursday last week, our bee mentor said it was time for our first honey harvest. he came over (that's him on the right) and helped us take the honey-laden frames. only one of our bee families had produced anything, the other one seems to have a lazy queen and has not been doing their job (more about that in a separate post).


but our well-functioning bee family is doing very well. twelve frames, heavy with golden honey, were ready to be harvested. here, the sun shows just how full and beautiful the frames were.


husband constructed the box you can see. you need a box to transport the frames in. husband made one that fits six frames, as honey-filled frames are heavy and to carry more would be pretty hard on your back. he estimates that the boxes cost approximately 60DKK (about $12) apiece to make in materials - wood and hinges. the box has a bottom and a lid, as once you take the frames, you don't want the bees to find their way into them and try to come along to the harvest.


the bees indicate that they are finished with the frame by sealing it off, as you can see in the photo above. i found out the hard way that the bees are not at all pleased to have their hard work removed. i was merely the photographer and thought i was at a safe distance, but i got stung on my cheekbone. i can tell you it was VERY painful. the kind of pain that actually takes your breath away (tho' i didn't have an allergic reaction) and i actually had to lie down for awhile - it made me feel quite ill.


we transported our two boxes, which contained the twelve frames, to our bee mentor's house. he has a centrifuge for extracting the honey, so we did all of the work there. the sealing wax must be scraped off with a special tool. sabin loved that part.


each frame is spun in the centrifuge three times and the centrifuge holds four frames. the honey is spun in one direction, then the frames are turned and spun again. then you return it to the original position and spin one last time.


at this stage of the year, the frames are returned, wax intact, to the bees, so they can fill them again for the later harvest (some time in august). i didn't get photos of the empty frames, but they look a bit forlorn and messy, but the bees very quickly remedy that when you give them back to them.


the centrifuge has a tap at the bottom and you capture the honey in a clean white plastic bucket. it's then strained through a large mesh sieve to get the last bits of wax out of it. i somehow neglected to photograph that part as well.


i wanted some honeycomb along with the honey, so we cut the middle section from one of the frames. the bees will quickly build that back again (and hopefully won't lay any drone eggs there). i had to have some because i wanted to chew on a bit of wax, like when i was a kid.


we got 22 kilos - or 45 pounds of honey from our 12 frames. a pretty good harvest for the first time and for only one bee family. the honey has to stand for a couple of days before you put it into the containers. we got a big stainless steel stirrer that husband fits onto his drill and you stir it to aerate the honey, to help along the natural process, which i guess is a sort of fermentation (we're still learning). after two days of stirring and settling, we tapped the honey into the containers. we had friends visiting and the kids loved that part of the process. we filled 32 glass jars and 10 of the plastic ones with our first harvest.

we don't expect to sell any of it this round, but use it for our own consumption in tea and baking and in making cordials and preserves.  i expect to be experimenting in the kitchen very soon.

*  *  *

further investment we made to get ready for the first harvest included purchase of a bee brush, for brushing them off the frames to put them into the box - 35DKK ($6.50), a special tool for lifting and separating the frames - 68DKK ($12.75), protective bee clothing for sabin -  200DKK ($37.50), 90 plastic containers with lids for the final honey product - 156DKK ($30) and 36 glass jars with lids - 96DKK ($18). the stainless steel stirring implement was 200DKK ($37.50).  we need several good buckets and the bucket with a tap on it (tho' our bee mentor gave us that one), so there will be some investment in that as well. eventually, we will get our own centrifuge, but at this stage and on the small scale we're working, we will use our bee mentor's equipment.  that raises our total investment thus far to 4610DKK ($864).

11.7.11

The Evolution of Farm Bags


When we moved to the homestead and were contemplating creating our garden, in a much neglected space where one had once been, we approached a few friends and asked if anyone was interested in trading labor for produce.  One couple enthusiastically offered, and that began our first farm season 3 years ago.  We worked very hard, and had more than enough food for both of our families to enjoy the whole season and most of the winter.  It was during that time, that I began to blog, thinking it would be a great outlet to catalog our garden each year. 

Last year, we offered the idea of farm bags to a handful of friends who wouldn’t mind being guinea pigs.  Five took us up on it and we started delivering produce once the season began, about weekly.  We learned a ton last year and as a result adjusted our approach this season.  Firstly, I researched CSA’s in many different areas of the country to get a feel for the quantities that were provided with each allotment, as well as how they were pricing.  In most CSA’s you purchase a share at the beginning of the season that helps cover the farmers costs, and then receive the boxes weekly.  These prices averaged anywhere from $400-$500, in our area of the country, for 16-20 weeks. It was important to us to include some value added things in bags so I spent time this winter, laying out and printing recipes and food tips to include with our bags.  I also experimented in appliquéing kitchen towels, soap making and a number of other things that we could include as little trinkets of the farm. 

This spring after I excitedly ordered seeds, I sent out a mass email to everyone who participated last year as well as a number of other’s who had expressed an interest, and laid out some guidelines for our season.  At the end of the email I asked for a response if interested.  I figured we could handle eight families this year, first come first serve.  These are the guidelines that we put forth this year:

:: Each bag will be $15 ($18 for egg families) weekly to every other week depending on the season.  Some bags early on may be smaller, and later on may be extremely bountiful.  (It really concerns me to get money upfront, I would rather people pay per bag.  I am already a little twitchy about being sure I stay in touch during slow times and try to flesh out the bags early in the season, so that people feel the return for their investment).

:: We will supply a farm bag to be refilled weekly and will pack delicate produce in green bags, to be rinsed and returned for future bags.

:: Farm bags need to be picked up at our house or place of business. (Last year I delivered bags and that added a whole other layer of stress, as I would race from place to place in between work and home and deliver the bags and then worry about leaving them on porches in the heat if someone wasn’t home.)

:: We made sure to be clear that our harvest would be directly related to the season and how cooperative our cooler northern weather was. 

:: Instead of simply planting  an abstract ‘more’ than what we need for our two families (us & our  friends who come out weekly to help), we took a more scientific approach and planted either a row per family(carrots) or a plant per two families (eggplant) depending on the item.

:: We brought a second refrigerator to the main floor to help hold produce overflow.  Last year, every time we opened our main fridge it was an adventure in Jenga to get something in or out. 

B and I spend some time each morning and evening perusing the garden, spot weeding, making sure things aren’t too dry or that there aren't any bugs.  We are always amazed at how quickly everything grows this time of year.  It happens literally before our eyes!  End result, we have 10 farm bag families and an ever growing waiting list.  As I go to post this, I'm headed out to stake all of our pepper plants that were hit by wind sheer in a severe thunderstorm this morning.  I am certain that we will learn even more about logistics this season, one thing is for sure, it is quite a ride!

~Amy


7.7.11

Garden Bag One~ Delivered!

1st bags ready
This past weekend was crazy busy.  We  hosted our annual chili cook-off for just over 70 people (adults and kids) and it was the Fourth of July here in the U.S. and in our little town that is a big event.  We also delivered of our first garden bags to the eight families that are participating in our little CSA experiment (at some point I'll feel more comfortable dropping the word experiment).

It has been an incredibly cool season, and as a result we are averaging 2-3 weeks behind last year's harvest.   So our plan was for the first bag to be small and a taste of what's to come.  It surprised both of us, that it ended up being a fairly decent sized bag even with the little tidbits.  The inaugural bag included:  Micro-greens, mustard greens, green onions, garlic scapes, rhubarb, sugar snap peas, a few baby squash & a jar of our rhubarb ginger jam.  I would say size wise, the everything except micro-greens, rhubarb, and jam could be used to make a good sized stir fry meal for a family with some onions and scapes left over. 
Farm Bag #1 Contents
We did have some excitement though.  Most of the farm bag families were at our cook-off, so we planned to hand out bags there.  There had been an apartment sized refrigerator left by the previous owners here and B moved it downstairs into the mudroom for the season for produce overflow.  When I reached in to pack up the first bag the top two shelves had frosted!! UGH!  Lesson learned, and now the fridge has some new settings.  The micro-greens had to be replaced, but an interesting note~ mustard greens survive a frost both outside when their in the ground and once harvested inadvertently in the fridge.

Overall, we are off and running and I think with the warm weather that we have finally had the last ten days or so, we may just have another bag headed home this weekend!

4.7.11

homemade vanilla extract

Recently I read on another blog how to make your own vanilla extract. It so super simple I couldn’t believe it! 2 ingredients….vodka and vanilla pods. No artificial colorings, corn syrup, water or added sugars. From what I have read, it doesn’t matter if you use inexpensive vodka or pricey. I am going for money saving so I will pick the least expensive. 022

After pricing vanilla pods, (I’m going to call them pods…isn’t what you scrape from the insides the beans???) it looks like Ebay is the cheapest. I ordered 20 Tahitian Vanilla Pods for a little over $7 (that included shipping). Even through their vacuum sealed package they smelled divine!
024

Lets get started on the extract:

750ml bottle of vodka
12 whole vanilla pods
Dark Rum (optional)

If you want to make a smaller bottle:
2oz bottle
1/4c Vodka
1 vanilla pod

Split your beans lengthwise using kitchen shears or a sharp knife. Leave at least 1” connected at one end.
027
Push the beans into the vodka bottle (I decided to use a mason jar...it held all of the vodka with room to spare) If you use the vodka bottle the beans are going to displace some of your vodka so add a splash or two to your orange or cranberry juice.
Screw the lid on tightly and store in a cool, dry place. Shake the bottle once or twice a day for the first couple of days. It will take a couple of months for the beans to steep in the vodka, you can use it sooner if you are in a rush. Store it well and it will last for years.
Use a funnel and transfer it to smaller bottles if you would like. Add a splash of dark rum if you choose while the beans are steeping. If you use some of your vanilla while its steeping add more vodka. When the 2 months are up you can remove the pods, dry them and use them for other purposes. I am thinking of making vanilla sugar.
Some recipes I have read say to strain the extract after you remove the pods. Why would you do that? I am going to leave as is….straining would remove the delicious flecks of beans, right????
031


Organic vs. Non-organic….sure, you can pay more for certified organic beans if you wish. Different countries have different standards for organic certification. From what I have read certification is done by the country that the product is grown in….for example for those of us here in the US, the USDA cannot certify Mexican vanilla pods as organic. Please correct me if I am wrong.
Virtually all vanilla pods are grown in third world countries…the orchids are pollinated and harvested by hand. These poor rural farmers cannot afford pesticides and fertilizers. You choose J
And just think...for a little over $13 you dont have to use this
026

You don’t have to limit yourself with vanilla extract…you can also make orange, lemon, cinnamon and almond extract. Maybe more, but that was what I had came across.
In about 2 months, this should be done...don't forget to give it a shake.